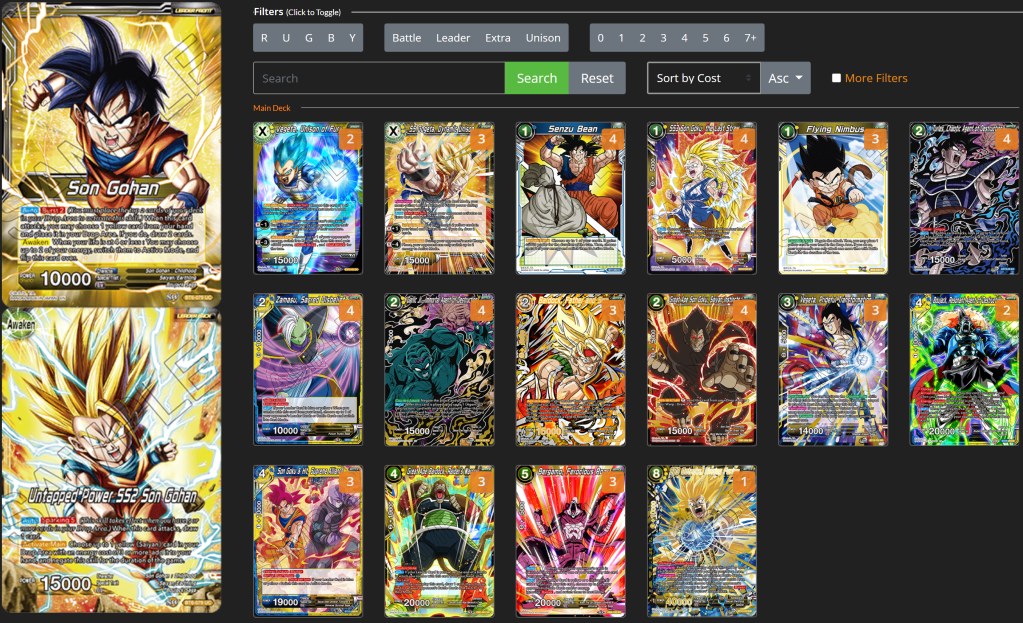
After a tease in Series 8, SS4 Vegeta has finally made his debut in Vermilion Bloodlines and of course has already received an overwhelming amount of attention from the DBSCG community. This attention has a lot to due with the leader’s built-in ability to ramp on both sides just by dealing damage, which definitely seems really powerful when you have the right payoffs. Series 11 certainly delivered some powerful cards, but it seems we’re still going to be reliant on some tools from the past to get the job done.
Let’s get into our list:
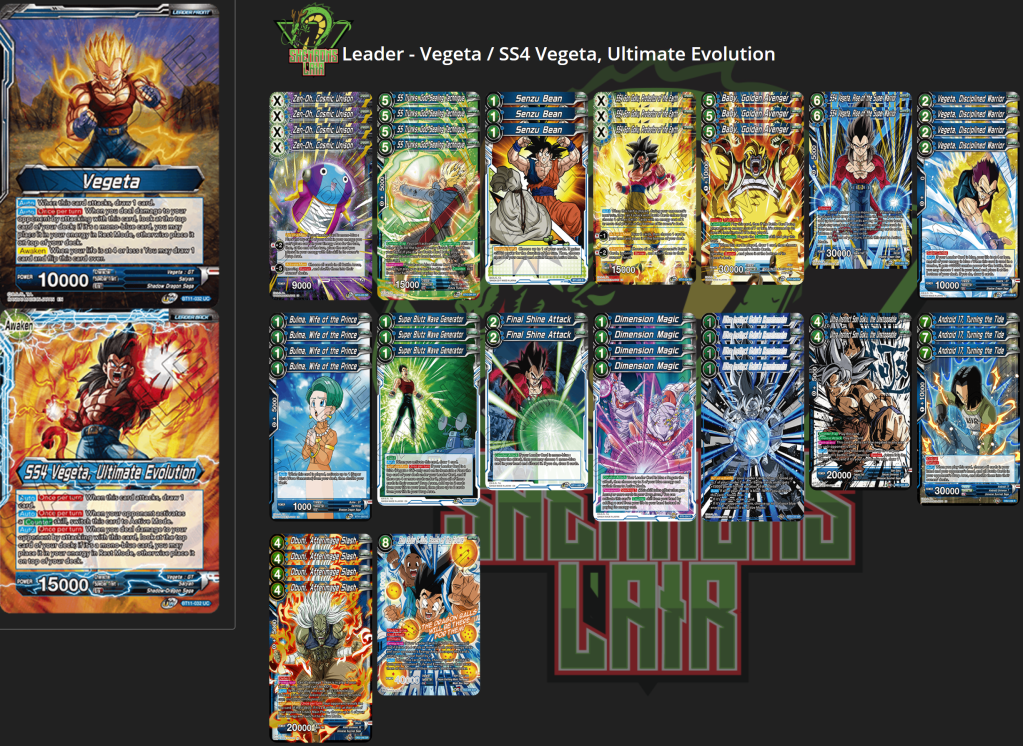
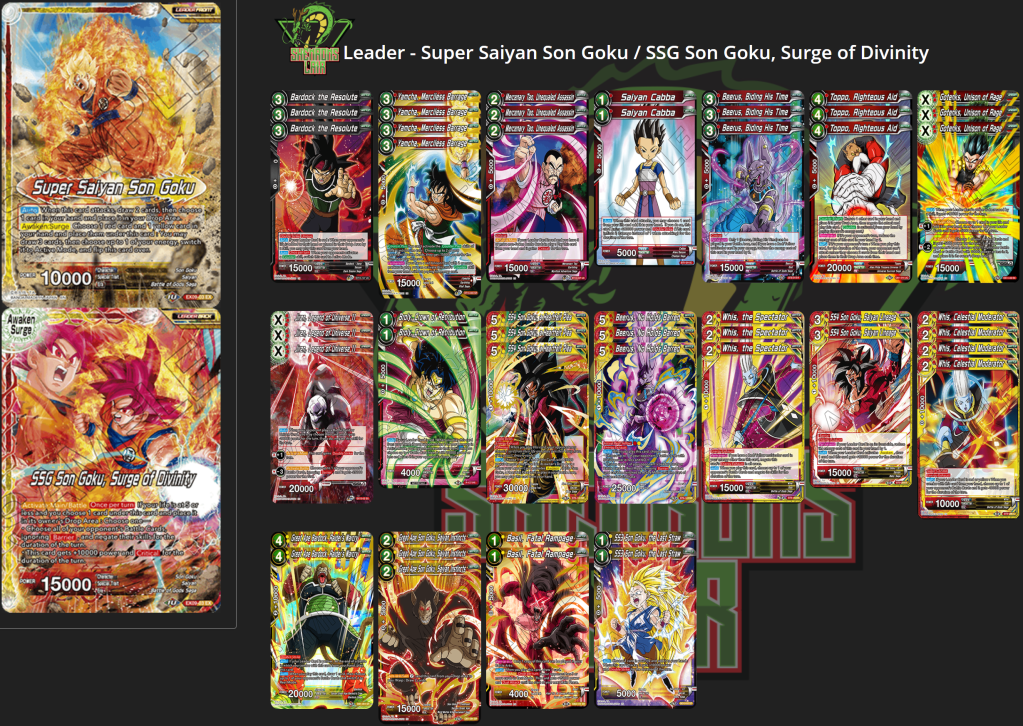
An Argument for Bulma, Wife of the Prince + Super Blutz Wave Generator
As we all know, the “machine” tends to theorize and test hundreds, upon thousands, of iterations of decks before the best version comes to light. This statement isn’t meant to lead you to the version posted above being the best version, but really I just want to call attention to the nuance of Bulma + SBWG and how it has a much needed way of both creating urgency for the opponent and allowing you to draw more of your threats/answers more often.
Turn 1 on the play or draw, if you play Bulma, it is not only going to tutor SBWG, it activates it as well. Then, SBWG draws you a card upon activation. This means Bulma is thinning a card out of your deck, then allows you to draw an additional card. This already moves you through two cards in your deck, plus your leader swing. As you can see this small ripple has the potential to then create a butterfly effect, since now you’ve just increased your opportunity to draw the cards you need/want throughout the remainder of the game.
Additionally, once you start activating SBWG each turn, it forces the opponent to swing at your leader, otherwise you’ll self awaken. This creates urgency, which allows Vegeta to access his awakened side much quicker and we all know that’s exactly where we want to be. All of this upside, and the subsequent copies aren’t even bad to draw since Bulma either thins your deck again or SBWG acts as a simple cantrip.
The Art of Manipulation
As mentioned in the beginning the hype around SS4 Vegeta has been the fact that the leader has the built-in ability to ramp on each side, but what if I told you that sometimes just the threat of ramping is so much more powerful than actually ramping? Once you begin mastering which turns you need to ramp and which you don’t, based on a given match-up, you’ll quickly start realizing that your leader swings often trade for a card, and in some cases high value negates or combo pieces the opponent was relying on.
This threat of ramping creates a tension that usually always works in your favor and additionally gives you the ability to control the opponent’s hand size and overall defense across the course of the game. This is why Vegeta can’t be all about ramping, he has to also play a normal game as well. This reality that gets created for the opponent plus the blunt force turns with UI Kamehameha places the opponent on the back-foot to where they never truly know what your goal is, when honestly you’re just trying to keep the game going since your deck has, on average, more powerful cards.
The Setup Man

First off, this card does not need to be banned.
The role this card plays is gigantic for the overall success of this deck. Yes, ramping it out early is powerful, but honestly it just does so much work for you by providing four, relevant bodies that can pressure the opponent and take the pressure off of you when you’re trying to find more threats throughout the mid and later parts of the game.
Obuni is our setup man by acting as a boxer throwing body shots throughout the course of the game. The longer he stays on board, or the more copies you play, the more resources he eats up while you’re still heading towards the endgame.
Commence the Endgame

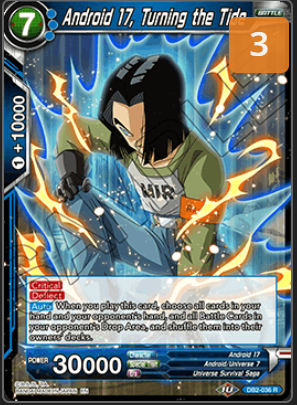
Upon its release you all know I could not stop gushing about Turning the Tide. The complaints about Gogeta, Hero Revived ultimately led to a ban and players then wondered if blue would ever receive a powerful “boss monster”. Turning the Tide has [Deflect], puts the opponent, and yourself to 0 cards in hand, and is a 30k [Critical] attacker – #snapped.
If Obuni is our setup man, then Turning the Tide is definitely our closer. With an established board there are few ways to survive a turn where Turning the Tide hits the table. This is the finisher ramp/control players live for.
Role-Players and Unisons
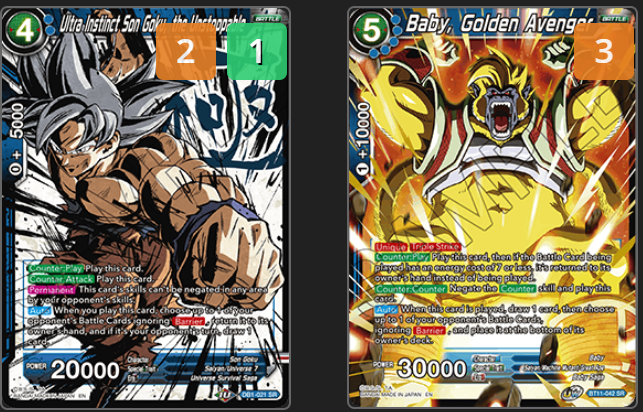
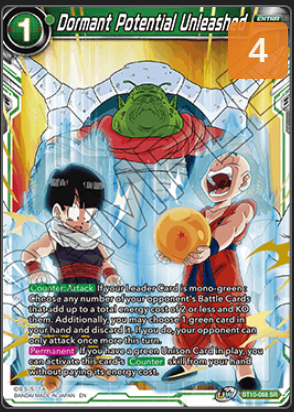
Ultra Instinct Son Goku, the Unstoppable saw a huge drop off in play once ramp strategies lost their viability. With the resurgence of ramp, along with hard to stop threats, we have the opportunity to go back to playing this card which honestly feels great in a ton of spots. The ability to get around a [Deflect] threat is so powerful and for just four energy I am more than happy to include it in our build.
Baby, Golden Avenger is definitely the most obvious inclusion. It is a [Counter: Counter] that truly negates the counter and comes into play, or has the option to be used as a [Counter: Play] for a threat cost 7 or less that then comes into play and places any opposing threat on the bottom of its owner’s deck, and draws you a card. It also has the upside of being a 30k [Triple Strike] attacker. Nuff said.

Zen-Oh is the most obvious inclusion of the two cards pictured since it does absolutely everything you could ever want in a deck as energy hungry as this one.
SS4 Son Goku, Protector of Earth on the other hand has been receiving little to no attention, which baffles me. The turn it comes down it basically shuts off any Battle Card attacks, has a ton of markers on it, and then you gain access to two amazing minus abilities. The first lets you filter by drawing two cards and then bottom decking the worst card in your hand, and the second is a minus two that bounces all of your opponent’s Battle Cards back to hand, ignoring [Barrier]. SS4 works so well in tandem with Turning the Tide as well. Let’s say on your 6th energy you play a SS4 Goku for 5 and leave an energy open. Then you trigger the [Auto] and then use the minus two ability to bounce all of their threats back to hand. Now, they can’t really attack with Battle Cards at all, you will probably have access to a God-Sealing Trunks, and then the next turn you just Turning the Tide to send all of those cards you bounced back back to the owner’s deck and start using the minus 1 ability to draw cards. THE JUICE!!!
Sideboard Talks
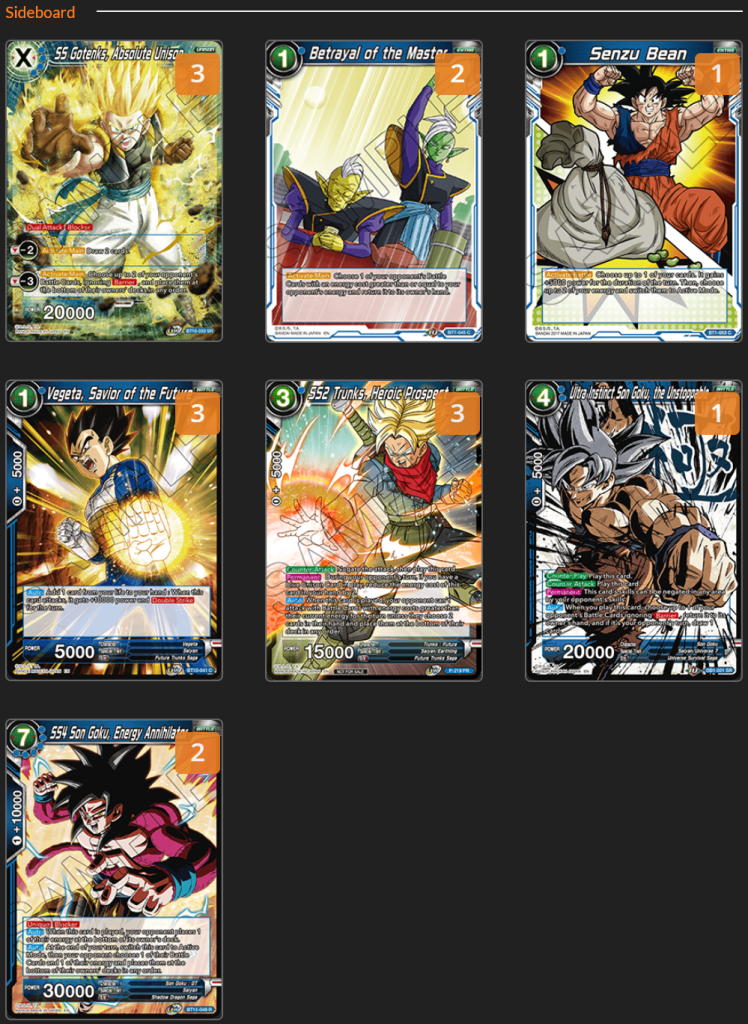
3x SS Gotenks, Absolute Unison – I enjoy bringing this in as a secondary 4 energy play to Obuni that gives me whatever I need more of at that time between removal or card draw. Additionally, I like to bring Gotenks in against Dredgeku as a sticky, hard to remove threat that provides pressure and utility.
2x Betrayal of the Master – With the new Gogeta 6 proving to be incredibly powerful I feel it is needed to address it somewhere in the 65 and Betrayal offers me that. Additionally, I feel it is really important to keep the deck pure, mono blue so I have no possibility of a flip being missed.. ever.
4th Bean – Season to taste. Whenever, wherever we’re meant to be together. I’ll be there and you’ll be near, and that’s the deal my dear.
3x Vegeta, Savior of the Future – Series 10 Unisons are still vulnerable to one energy double strikers.
SS2 Trunks, Heroic Prospect – You NEED this against Dark Broly and the card is such a huge boon against most aggressive strategies.
3rd Ultra Instinct Son Goku, the Unstoppable – Blue mirrors and decks that contain hard to address threats. If you have access to this card in those spots, it will be a huge swing in advantage for you. This is why we give ourselves the 3rd in the board.
2x SS4 Son Goku, Energy Annihilator – If you’re on the play against the blue mirror, a slower deck like Syn Shenron, or a deck that can’t truly counter this card you’re going to want it. Just having a way to set back the opponent’s energy is so powerful in the right match-up. I definitely don’t think this deck could ever live in the main deck or come in on the draw, but on the play, in those match-ups is where it has the potential to shine.
Conclusion
SS4 Vegeta is definitely going to be a leader that people turn to in the early weeks of the format since it is so unique and offers you access to some very powerful plays. There is so much room for exploration and innovation with this set that this is possibly the most excited I have ever been for a set release. It is great to finally have true ramp back again along with all of the new archetypes that Vermilion Bloodlines is offering us. If you get a chance I would love to see the lists you’re all working with, feel free to comment a link to them down below or just send them to us via the contact page.
#scrubfamisbestfam #KTHXBAAAIIIIIIII